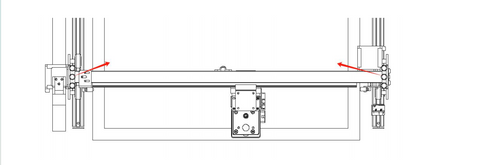
1.How to Rotate the X-axis to use the rotary roller
You can follow our official video to learn how to use it:
https://www.youtube.com/watch?v=Rrkynq5UheU
Connect to your computer, turn on lightburn or LaserGRBL, and use the Z reset command to reset the z-axis.
Power off the machine, use a screwdriver to remove the 4 screws in the picture below.

Use a screwdriver to remove the middle 2 screws in the picture below

Rotate the x-axis 90 degrees clockwise and install the 6 screws previously removed as follows.


If the laser module is 10W, you need to use two pieces of 10W spacer to put into the bottom case square first; If the laser module is 5W, two pieces of 5W shims need to be placed into the bottom case square first.

Unscrew the claw disk with the claw disk turning lever, clamp the round carving object,and adjust the tail top to support the carving object

If you need to engrave vertically, you need to adjust the rotary screw (or hand screw),rotate the motor and then tighten it to fix it.

Rotary Roller Parameter settings
1,Firstly, you need to measure the diameter of the object to be machined in mm. Assuming a measurement of X mm.
2, Then you need to calculate the value of $101, Calculated by the following formula:
$101=2548/Diameter of the object to be processed=2548/X=Y.
For lightburn to process
3,If you use lightburn to process, Turn on the machine and connect with you computer. Open edit in lightburn and find Machine Settings as follows:

4, Find Y steps per mm($101) and change the last parameter from 80 to the previously calculated value of Y (Note that this parameter needs to be changed back to 80 when you want to use planar machining)

For LaserGRBL to process
5.If you use LaserGRBL to process, Turn on the machine and connect with you computer. Open Grbl in LaserGRBL and find Grbl Configuration as follows:

6.Find $101 and change the parameter from 80 to the previously calculated value of Y (Note that this parameter needs to be changed back to 80 when you want to use planar machining)

7, When working, the Rotary Roller is placed in the GM1 machine in the position shown below

The file to be processed requires the following settings:
(1), File mirroring operation
(2), Rotate 180 degrees

The final text effect is shown below


